- Home
- >
- Resources / How to Create Event
Creating an Event
Four easy steps. Check out Stepwise Process below.
Enter Event Details
First tab you will encounter is the Events tab. Fill out the form with your event details and event message. As the organizer, your name will appear on the invite, otherwise, you can change it to something else by selecting 'Other' under the Organizer Name.
- > Simple Form
- > Organizer Name override (optional)
- > One Click to save info and automatically move to the People tab

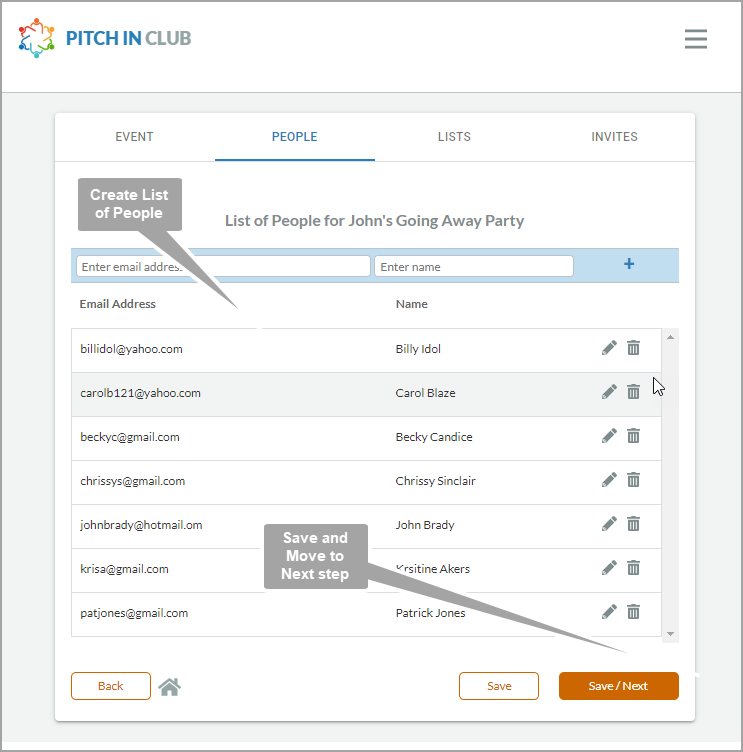
Create List of People
Use the People tab, to create and manage list of people you plan to invite to your event. Click on Save/Next button to save and automatically move to the Lists tab.
Sort list by name or email address; Fix typos quickly by editing or deleting entries in the list.
Create Contribution List
The Lists tab allows you to toggle between 2 lists, the Contribution List and the Helping Hands List. The Contribution List is the first list you'll see when you land on Lists Tab.
You can reorder Contribution items using drag and drop feature and Fix typos quickly using the 'edit' or 'delete' icon.

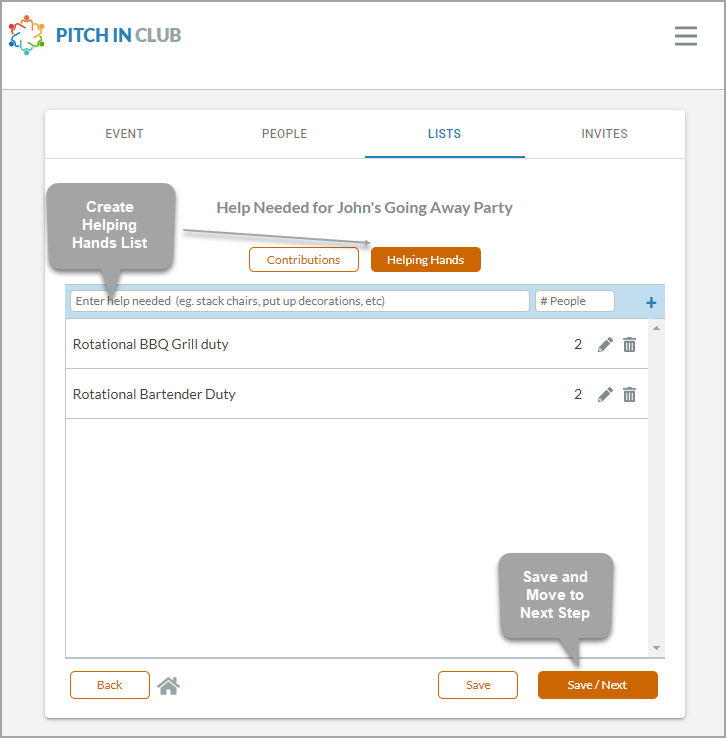
Create Helping Hands List
Create your Helping Hands List items with number of people needed, then click the Save/Next button to automatically go to the Invites tab
Both the Helping Hands List and contribution list allows you to reorder items using drag and drop and fix typos quickly using the 'edit' and 'delete' icons
Send Invites
Last step - Send out your invites.
If you forget someone, you can always come back, add them to the list, and send an individual invite.